Refilling perfume bottles is a must-know for any perfume lover. Not only is it convenient when traveling to be able to decant your favorite fragrance into a smaller bottle, but also for those who like to upcycle and craft with their empty perfume containers. Managing empty perfume bottles can be challenging, especially when nozzles are missing or broken, but there are various methods and DIY techniques to retrieve the remaining perfume and preserve usable parts for future use.
At first glance, a delicate glass perfume bottle might make you think twice about taking it apart. But once you know the anatomy of the bottle and have the right tools and technique to disassemble it without breaking it.
Follow these steps to open and refill your perfume bottles and transfer your signature scent into a new bottle with ease.
What You’ll Need?

Before you start decanting and refilling your perfume bottle, you will need a few tools. Having the right tools will make the process much easier and will minimize the risk of breaking your bottles. Here’s what you will need:
Main Perfume Bottle: This is the bottle you want to refill. Make sure it’s empty or has enough room to hold the new fragrance.
Pliers: A pair of pliers will help you remove any stubborn parts of the bottle, like the spray nozzle or cap, without breaking.
Scissors: Scissors can be used to cut any seals or plastic wrap around the bottle or to trim the funnel or syringe if needed.
Small Funnel or Syringe: A small funnel will help you pour the perfume into the new bottle without spilling and ensure that no precious fragrance is wasted during the process. A syringe is for more precise transfers, especially if the new bottle has a small opening.
Empty Bottle You Are Transferring Perfume To: Make sure this bottle is clean and dry. It can be a travel-size bottle or any other container you prefer.
Tissue or Thin Cloth: This will be used to wipe any spills or clean the edges of the bottles to have a neat transfer.
Now you have all your supplies, let’s get started with the process of how to refill perfume bottles. With the right tools and a little patience, you will be able to transfer your favorite scents!
Step 1: Remove the Cap and Sprayer of Your Perfume Bottle
The first step to refill your perfume bottle is to remove the cap. This is so you can access the inside of the bottle to refill. Here’s how:
Use Your Pliers: Take your pliers and gently grip the base of the sprayer or nozzle. Be careful to apply gentle pressure to avoid breaking the bottle or the sprayer. If the sprayer is really tight you can use a cloth to give you extra grip without scratching the surface.
Wiggle the Sprayer: Gently wiggle the sprayer back and forth. This will help loosen it from the bottle. Continue to do this until the base of the sprayer is visible and can be removed. Be patient during this step; don’t rush, as it can break.
Remove the Sprayer: Once the base is exposed, you should be able to pull the sprayer straight out of the bottle. If it feels stuck, continue to wiggle it gently until it comes out. If you encounter a lot of resistance, you can apply a few drops of warm water around the base of the sprayer to help loosen any residue that’s causing it to stick.
Pro Tip
If you are going to reuse the bottle, it’s a good idea to protect it from scratches or marks during this process. Wrap a tissue or thin cloth around the cap sleeve before using the pliers. This will be a buffer between the pliers and the bottle so you don’t damage it. You can also use a rubber band around the sprayer for extra grip so you don’t slip and damage the bottle. Additionally, always hold the bottle upright while applying gentle pressure to avoid spills and ensure effective handling.
Why is This Step Important?
Removing the cap and sprayer is the first and most important step in refilling. Not only do you get to access the perfume inside, but you can also clean the bottle thoroughly before adding a new fragrance. Residue from the previous perfume can affect the scent of your new fragrance so taking the time to do this step properly will make a big difference.
Cleaning the Sprayer
Before moving on to the next step, clean the sprayer and the inside of the bottle. Use a cotton swab dipped in rubbing alcohol to wipe the sprayer and the neck of the bottle. This will remove any leftover perfume oils, and your new fragrance won’t be tainted by the old one.
Now that you have removed the cap and sprayer and cleaned the parts, you can move on to the next step!
Step 2: Remove the Base of the Sprayer
Now that the cap and sprayer are removed from the perfume bottle, it’s time to tackle the hardest part of refilling perfume bottles: removing the base of the sprayer. When working with glass bottles and tools, it is crucial to exercise caution to avoid potential risks. This step is important so that you can access the perfume inside the bottle. Before you start, you need to check if your perfume bottle has a plastic or metal seal.
How to Open a Perfume Bottle?
Removing the base of the sprayer is to access the fragrance inside the bottle. Most perfume bottles are made of glass, with some made of plastic or metal. It is important to understand how these bottles function, particularly in relation to opening and maintaining them. Once you know if the base is plastic or metal, follow these steps to open it:
Plastic Base: If your perfume bottle has a plastic base, it should be easy to remove. Here’s how:
Use Scissors: Take a pair of scissors and slide the blade underneath the plastic base. This will create a tear between the plastic and the glass bottle.
Tear on All Sides: Work your way around the base and make small cuts on all sides. This will make it easier to remove the plastic from the glass.
Wiggle with Pliers: If the plastic doesn’t tear away, use your pliers to gently wiggle the plastic base left to right while pulling up. Be gentle. Don’t pull too hard, or you might break the glass bottle.
Remove the Base: Once it’s loose enough, the plastic base should come off. If you encounter resistance, take a moment to assess the situation and make sure you’re not pulling too hard.
Metal Base: If your perfume bottle has a metal base, it’s a bit more challenging since metal is less forgiving than plastic.
Here’s how to do it:
Loosen with Pliers: Take your pliers and grip the metal base. Wiggle it left to right to loosen it from the glass.
Be Gentle: Don’t clench the pliers too hard around the base, or you might break the glass underneath. Be patient. It may take a few minutes of gentle wiggling to get the base loose enough to remove.
Remove the Base: Once you feel the base loosening, continue to wiggle it until it comes off. If it feels stuck, take a break and try again to avoid damaging the bottle.
Personal Ideas and Tips
Create a Dedicated Space: Before you start the process, set up a dedicated space where you can work on your perfume bottles. A flat surface and good lighting will help you see what you’re doing and keep your tools organized. I like to lay down a soft cloth to catch any spills and protect the surface underneath.
Use a Small Container for Parts: As you remove the sprayer and base, use a small container to hold the parts. This will prevent them from getting lost and keep your workspace clean. It’s easy to lose small components, so having a designated spot for them will save you time later.
Document the Process: If you’re a visual person or like to share your experiences, consider documenting the process with photos or videos. This will be helpful for future reference or to share with friends who want to refill their own perfume bottles.
Try Different Scents: Now that you have the base removed and ready to refill, think about trying different scents. You can mix your favorite fragrances to create a custom blend that’s you. Just make sure to keep track of the ratios so you can recreate it later!
Consider a New Spray Bottle: For easier use, you might want to transfer your perfume into a new spray bottle. This involves carefully removing the original sprayer and pouring the perfume into the new vessel.
Pro Tip
Metal-based perfume bottles are more likely to break during this process, so you won’t be able to reuse them. If you find out your bottle is metal and you’re concerned about breakage, consider refilling a perfume atomizer instead. These smaller, portable containers are designed for easy refilling and are great for travel or daily use. Roll-on bottles include a screw-on cap to ensure the contents are securely sealed and protected from leakage.
Step 3: Remove Fine Glass and Spray Stem

No matter how careful you are, fine glass will break off the neck of the bottle—especially with metal-based perfume bottles. This is normal during the refilling process but can be managed with a few simple steps. Here’s how to do it:
If the cap is stuck, you can use a hair dryer to gently apply heat and loosen it after trying other methods.
Inspect the Neck of the Bottle: After removing the base of the sprayer, take a close look at the neck of the bottle. You may see small shards or fine glass pieces that have broken off. You need to address this before you refill your perfume.
Use a Tissue: To clean the neck of the bottle, take a tissue or a thin cloth and gently wipe the area. This will remove any fine glass particles without scratching the surface of the bottle. Be careful not to push any glass shards further into the bottle.
Check for Residue: After wiping, inspect the tissue for any glass fragments. If you see any, throw the tissue away immediately to avoid accidents. Make sure no glass gets into your perfume bottle, as this can contaminate your fragrance.
Remove the Spray Stem: If the spray stem is still attached and you want to replace it gently pull it out of the neck of the bottle. If it’s stuck, you can use your pliers to grip it carefully and wiggle it free. Again, be careful not to apply too much pressure that could break the glass.
Personal Ideas and Tips
Safety First: Always put safety first when working with glass. Consider wearing gloves to protect your hands from sharp edges. If you have a pair of safety glasses, wear them too to add extra protection against flying glass shards.
Setup a Cleanup Station: Create a small cleanup station nearby with a trash bin for broken glass and used tissues. This will keep your workspace organized and safe so you can focus on the refilling process.
Use a Vacuum: If there’s a lot of glass debris, use a small handheld vacuum to clean up the area. This will be quick and effective to make sure no shards are left behind and minimize the risk of injury.
Take Your Time: Don’t hurry through this step. Taking your time to inspect and clean the neck of the bottle will pay off in the long run and your perfume will be pure and free of contaminants.
Step 4: Use a Funnel or Syringe to Transfer Perfume
Now that the perfume is exposed, it’s time to transfer the liquid into your desired bottle. This step is critical to not waste any of your fragrance. Consider transferring the perfume into a new spray bottle for easier application. Instead of pouring the contents directly into your new bottle, where spills and messes can happen, use a funnel or a syringe to make a clean and smooth transfer.
Using a Small Funnel
Choose the Right Funnel: Select a funnel that fits into the opening of your new perfume bottle. A funnel with a narrow spout is best as it will direct the flow of the liquid and minimize spills.
Position the Funnel: Put the funnel into the neck of the new bottle, making sure it’s secure. If the funnel is too loose, it may tip over during the transfer and spill.
Pour the Perfume: Carefully pour the exposed perfume from the original bottle into the funnel. Take your time, don’t overfill, and keep an eye on the flow to make sure it’s going smoothly. If you feel resistance, stop pouring and check for blockages. Handle the perfume bottle spray carefully to avoid damage, especially when dealing with vintage bottles.
Using a Syringe
Choose a Syringe: If you want a more precise method, a syringe is the way to go. Look for a syringe that’s clean and has a big enough opening to draw up the perfume without any issues.
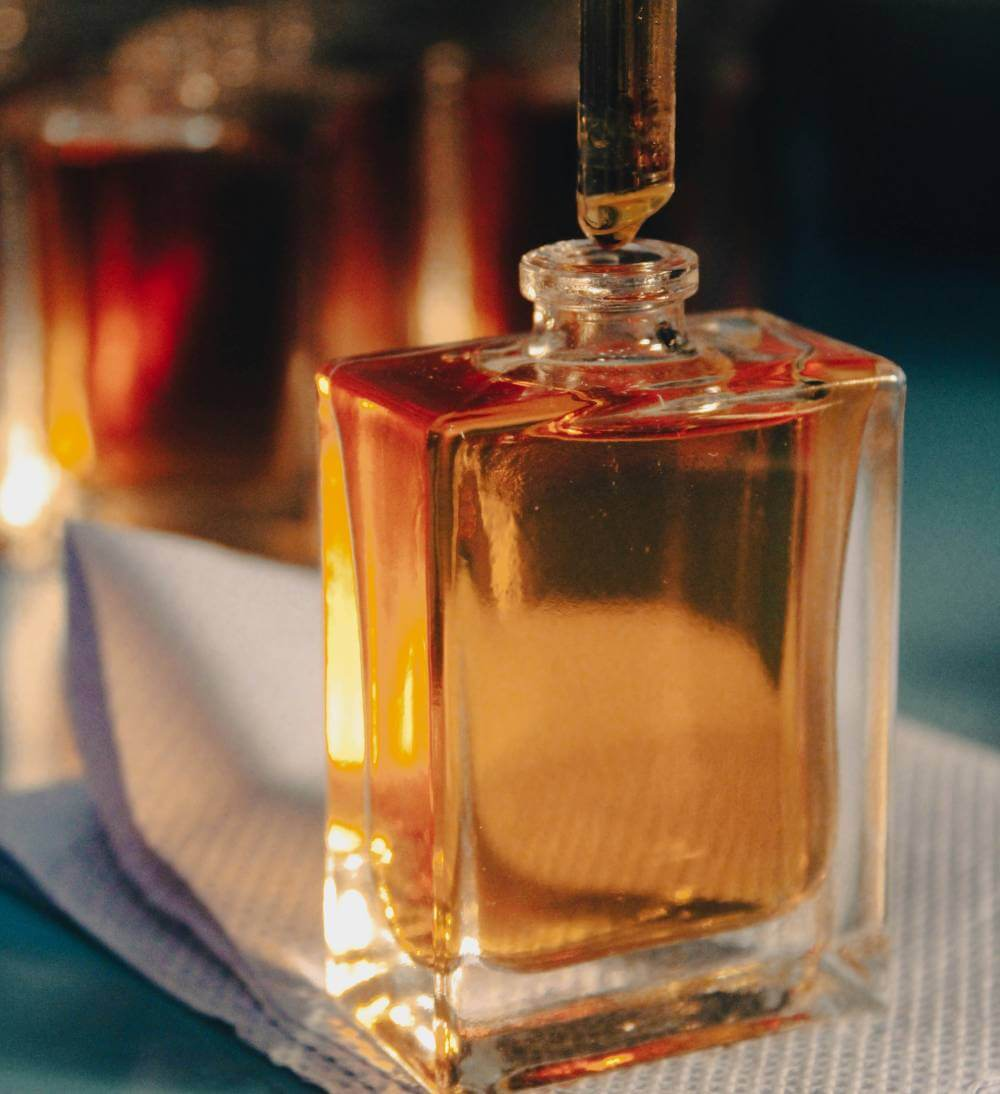
Draw Up the Perfume: Insert the syringe into the exposed perfume and pull back the plunger to draw the liquid into the syringe. Be careful not to touch the sides of the bottle to avoid contamination.
Transfer to the New Bottle: Once the syringe is full, carefully position it over the new bottle and slowly push the plunger to release the perfume. This will give you precise control over the amount of liquid being transferred and minimize the risk of spills. When dealing with vintage perfume bottles, it is crucial to handle them with care to preserve their integrity.
Personal Ideas and Tips
Work in a Contained Area: Do this step over a sink or a surface that can be wiped clean. If you spill anything, it can be quickly wiped up without damage.
Use a Funnel with a Filter: If you’re worried about any remaining glass particles or debris, use a funnel with a filter. This will catch any unwanted particles and make sure only the perfume goes into the new bottle.
Label Your Bottles: If you’re transferring multiple fragrances, label your new bottles. This will help you keep track of your scents and avoid any mix-ups in the future.
Take Your Time: Don’t hurry through this step. Taking your time to transfer the perfume will help you avoid messes and get every last drop of your favorite fragrance. This is especially important when dealing with an exquisite range of perfumes, as preserving their quality during the refilling process is crucial.
Step 5: Cap the Bottle
If you made it through the previous steps without breakage, congrats! You’re now ready to cap the bottle for future use. This last step is critical to keep your newly refilled perfume fresh and ready to use. Here’s how:
Reattach the Base: Start by trying to put the base back onto the neck of the bottle. If it fits snugly, press it back into place. Make sure it’s aligned properly to avoid any gaps that may cause leaks.
If the Base Doesn’t Fit: If the Base doesn’t fit or is damaged, you can skip this step and reattach the sprayer instead.
Attach the Sprayer: The sprayer should fit onto the neck like a missing puzzle piece. Align it carefully and press down gently. If your sprayer has a screwing mechanism, just screw it back onto the neck for a tight seal. This will keep the perfume contained and prevent evaporation or leakage.
Check for Leaks: Once the bottle is sealed, turn it upside down over a sink or paper towel to see if any liquid escapes. If you see any leaks, you may need to adjust the sprayer or base to get a better seal.
Personal Ideas and Tips
Store Properly: To extend the life of your perfume, store it in a cool, dark place away from direct sunlight and heat. This will keep the fragrance intact and prevent it from degrading.
Buy a Perfume Atomizer: If filling and refilling your perfume bottles seems too much to handle, consider buying a perfume atomizer. These small portable containers are perfect for carrying your favorite perfume or cologne. They’re easy to fill and can fit in your purse or travel bag. Great for travel or daily use.
Enjoy the Process: Refilling your perfume bottles can be fun. Take your time and enjoy the process. You’re not only saving money but also upcycling your bottles.


